Team and roles
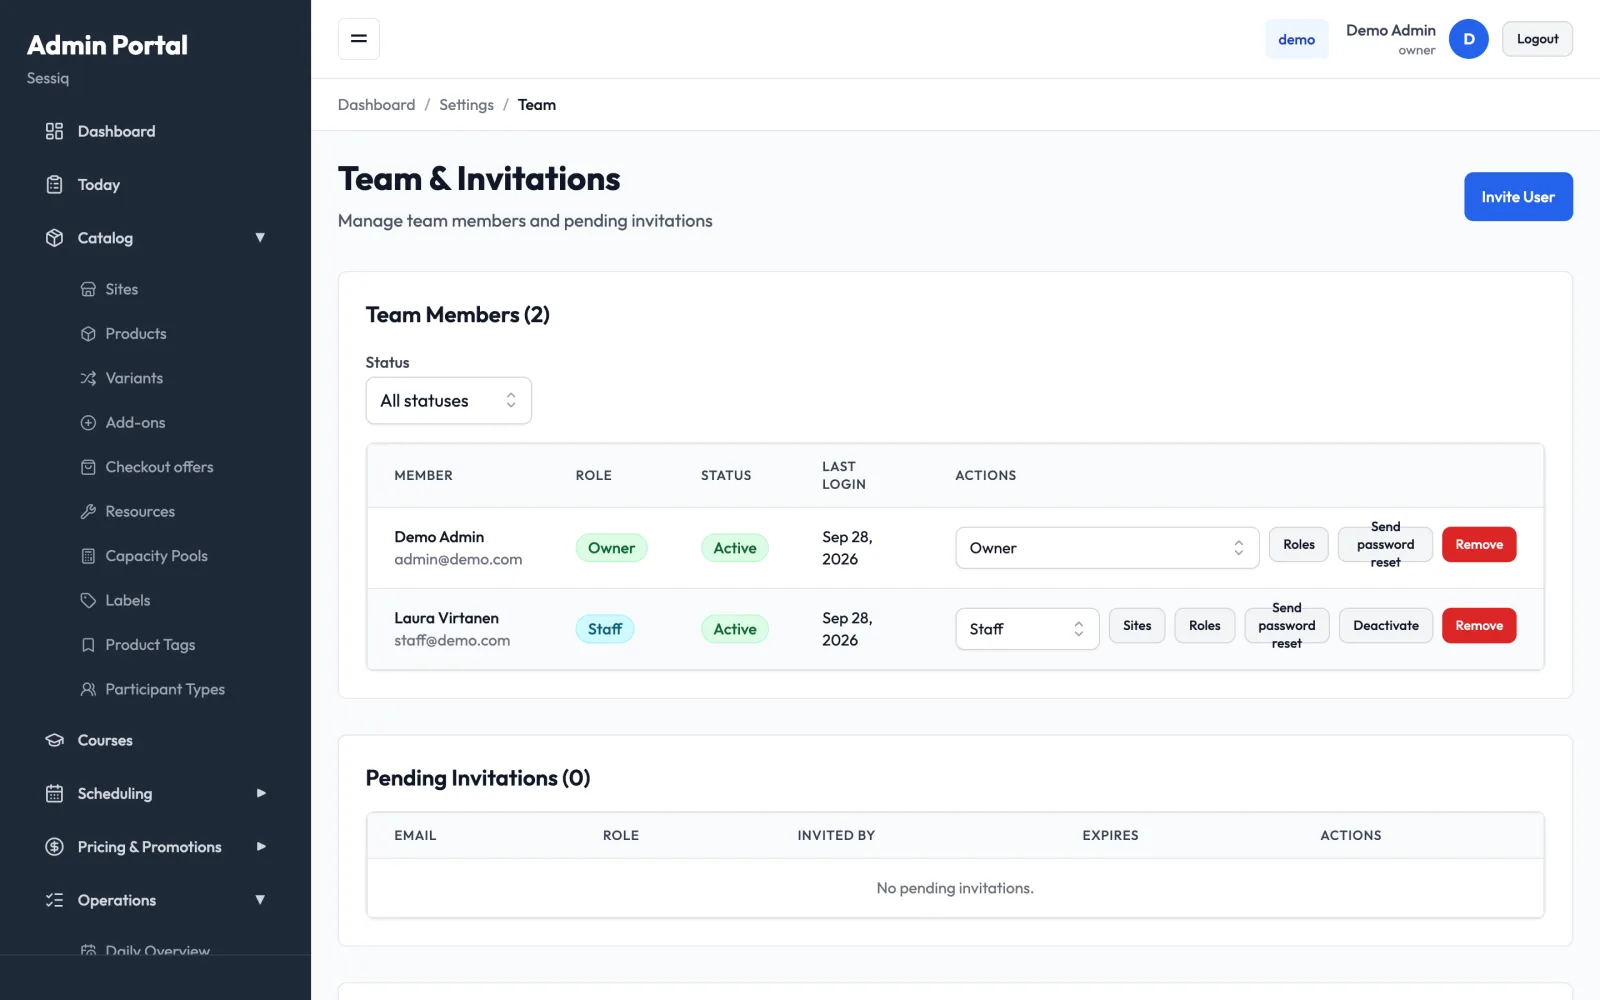
Give each person who works at your venue their own login, and decide what they can see and change. You manage this on the Team & Invitations page: open Settings → Team in the admin menu.
The page has three parts:
- Team Members: everyone who can sign in, with their role, status and last login.
- Pending Invitations: invitations that have been sent but not accepted yet.
- Roles: the built-in roles and any custom roles you create. Only people with the permission to manage team members, roles and assignments see this section. The built-in Owner role has it.
Invite a team member
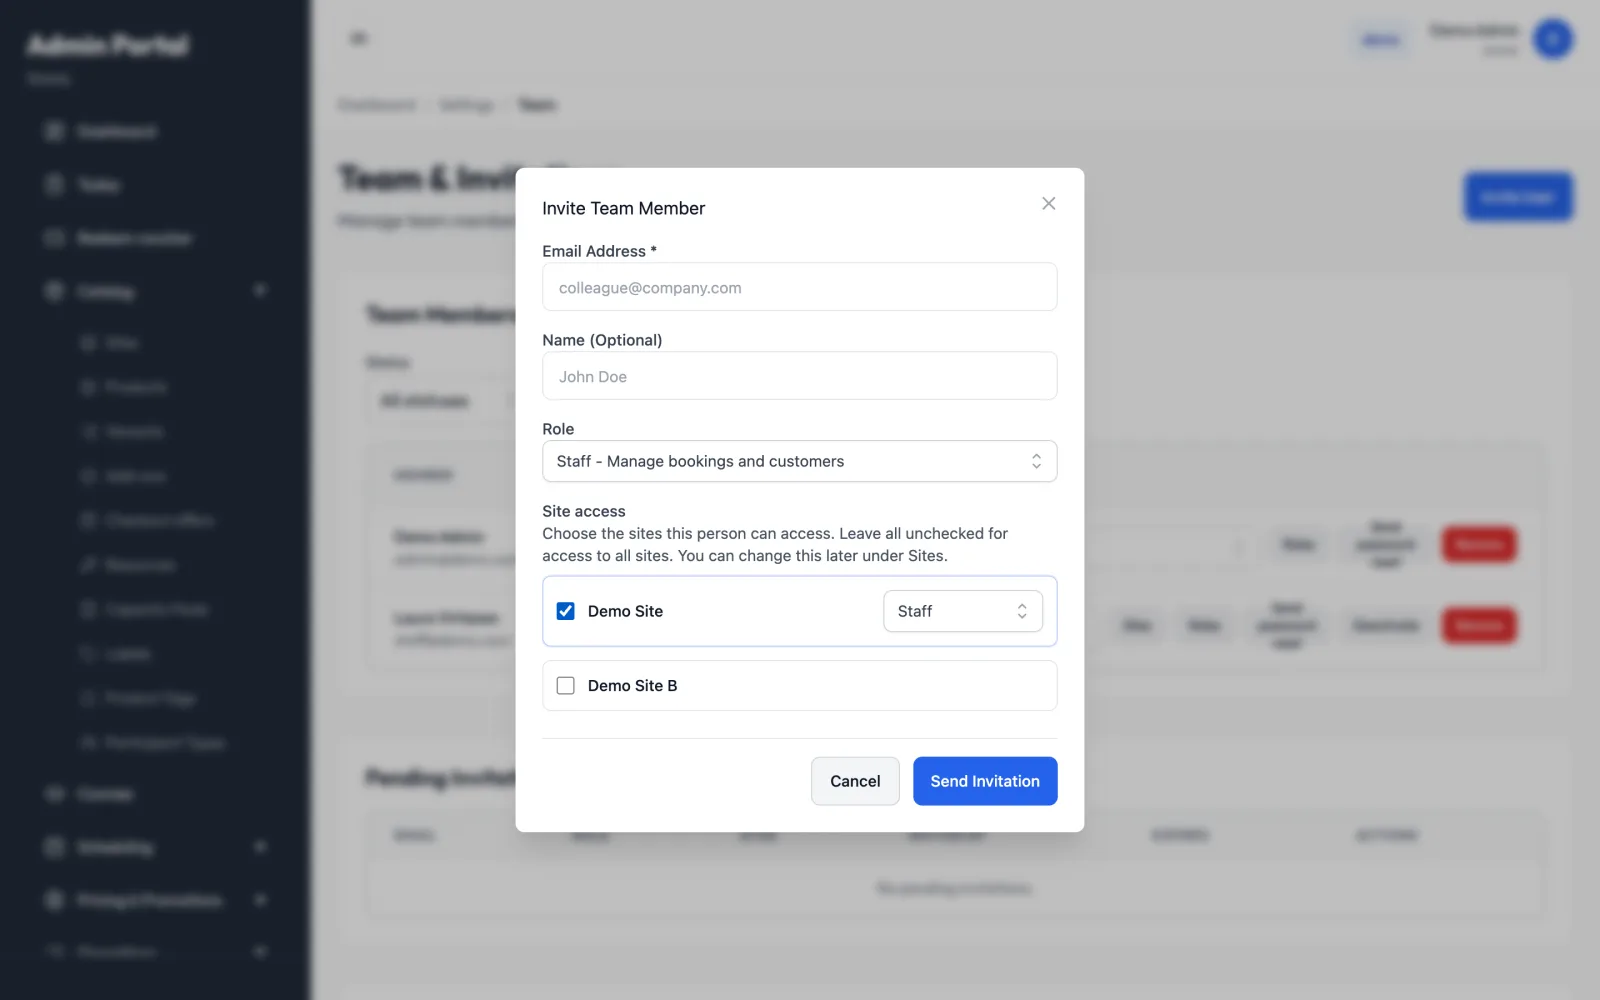
- Click Invite User.
- Enter the Email Address and, optionally, a Name.
- Choose a Role:
- Admin - Full access to all features
- Staff - Manage bookings and customers
- Read Only - View-only access
- Optionally, under Site access, tick the sites the person may use and choose Admin or Staff for each. Leave every site unchecked for access to all sites. You can change this later with Sites (see Limit a member to certain sites).
- Click Send Invitation.
The person receives an email with a link to set up their account. The invitation then appears under Pending Invitations, with the sites it grants (or All sites), who sent it and when it expires. Invitations are valid for 7 days.
When the person accepts, they are limited to the chosen sites from their first login, exactly as if you had set them under Sites afterwards. If every chosen site has been deleted in the meantime, accepting fails and the invitation stays pending; send a new one.
In Pending Invitations you can:
- click Resend to send the email again, for example if it went to spam
- click Cancel to withdraw the invitation
Your subscription plan may limit the number of users. Pending invitations count towards the limit. If you reach it, the invitation fails with a message asking you to upgrade.
Member roles and statuses
Each member row shows a Role badge and a Status badge.
| Role in the member list | Built-in role | What it is for |
|---|---|---|
| Owner | Owner | Everything, including team, roles and tenant-wide settings. |
| Admin | Admin | Full read and write access to operations and catalog. Cannot manage the team's roles. |
| Staff | Member | Front-desk daily operations: check-in, walk-in, courses. |
| Read Only | Viewer | Read-only access to the admin console. |
The member list and the Roles section use slightly different names for the same built-in roles. Staff is the Member role and Read Only is the Viewer role.
Status is Active or Inactive. Use the Status filter above the table to show only active or only inactive members.
Change a member's role
Pick a new role in the selector in the member's Actions column. The change is saved immediately.
Some rules protect your account from lock-outs:
- Only an Owner can make someone an Owner, or change an existing Owner's role.
- You cannot demote yourself.
- There must always be at least one Owner.
Reset a password
Click Send password reset on the member's row. They receive an email with a link to choose a new password. You never see or set their password yourself.
Deactivate or remove a member
- Deactivate blocks the person from signing in but keeps their account and history. Click Reactivate to let them back in. Only Owners see this button, and you cannot deactivate yourself.
- Remove takes the person off your team completely. You are asked to confirm first.
You cannot remove or deactivate yourself, and you cannot remove or deactivate the only Owner. Only an Owner can remove or deactivate another Owner.
For seasonal staff who will come back, use Deactivate instead of Remove. Reactivating is one click, and they keep the same login.
Limit a member to certain sites
If you run several sites, you can restrict a member so they only see bookings and data for the sites they work at. Owners see a Sites button on every member who is not an Owner.
- Click Sites on the member's row.
- Tick each site the person should have access to.
- For each ticked site, choose Admin or Staff.
- Click Save.
If no site is ticked, the member has access to all sites. You cannot restrict your own site access, and Owners always have access to every site.
Built-in and custom roles
The Roles section lists every role. Built-in roles carry a Built-in badge. Roles you create carry a Custom badge. Each row shows how many permissions the role includes and its description.
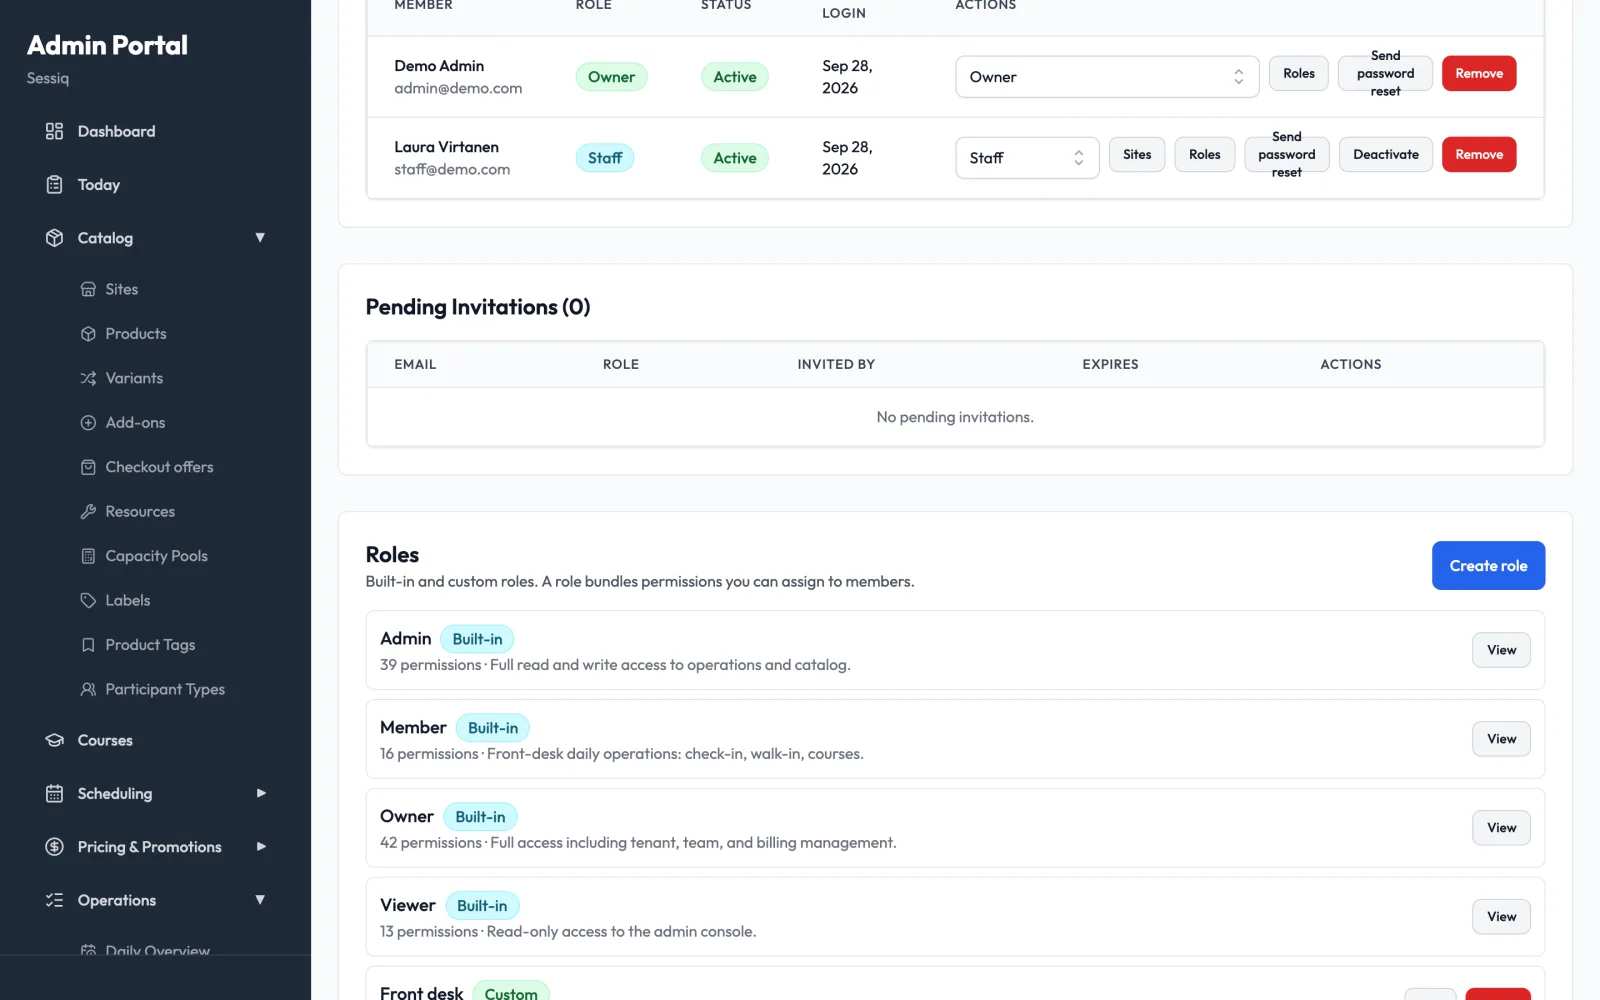
Built-in roles cannot be changed. Click View to see exactly which permissions a built-in role includes.
Read and manage permissions
Permissions are grouped by area, such as bookings, courses, pricing or promotions. Most areas come in pairs:
- a read or view permission, which lets someone look (for example
pricing:read, "View pricing") - a manage or write permission, which lets them create, edit and delete (for example
pricing:manage, "Create, edit, and delete pricing rulesets and rules")
This lets you build roles such as "can see prices but not change them".
A few permissions have a Restricted badge. They control tenant-wide configuration, team members and roles, and billing. Treat them with care.
Create a custom role
- In the Roles section, click Create role.
- Enter a Name, for example "Front desk lead", and an optional Description.
- Under Permissions, tick each permission the role should include. Each permission shows a short description.
- Click Save.
A role must include at least one permission.
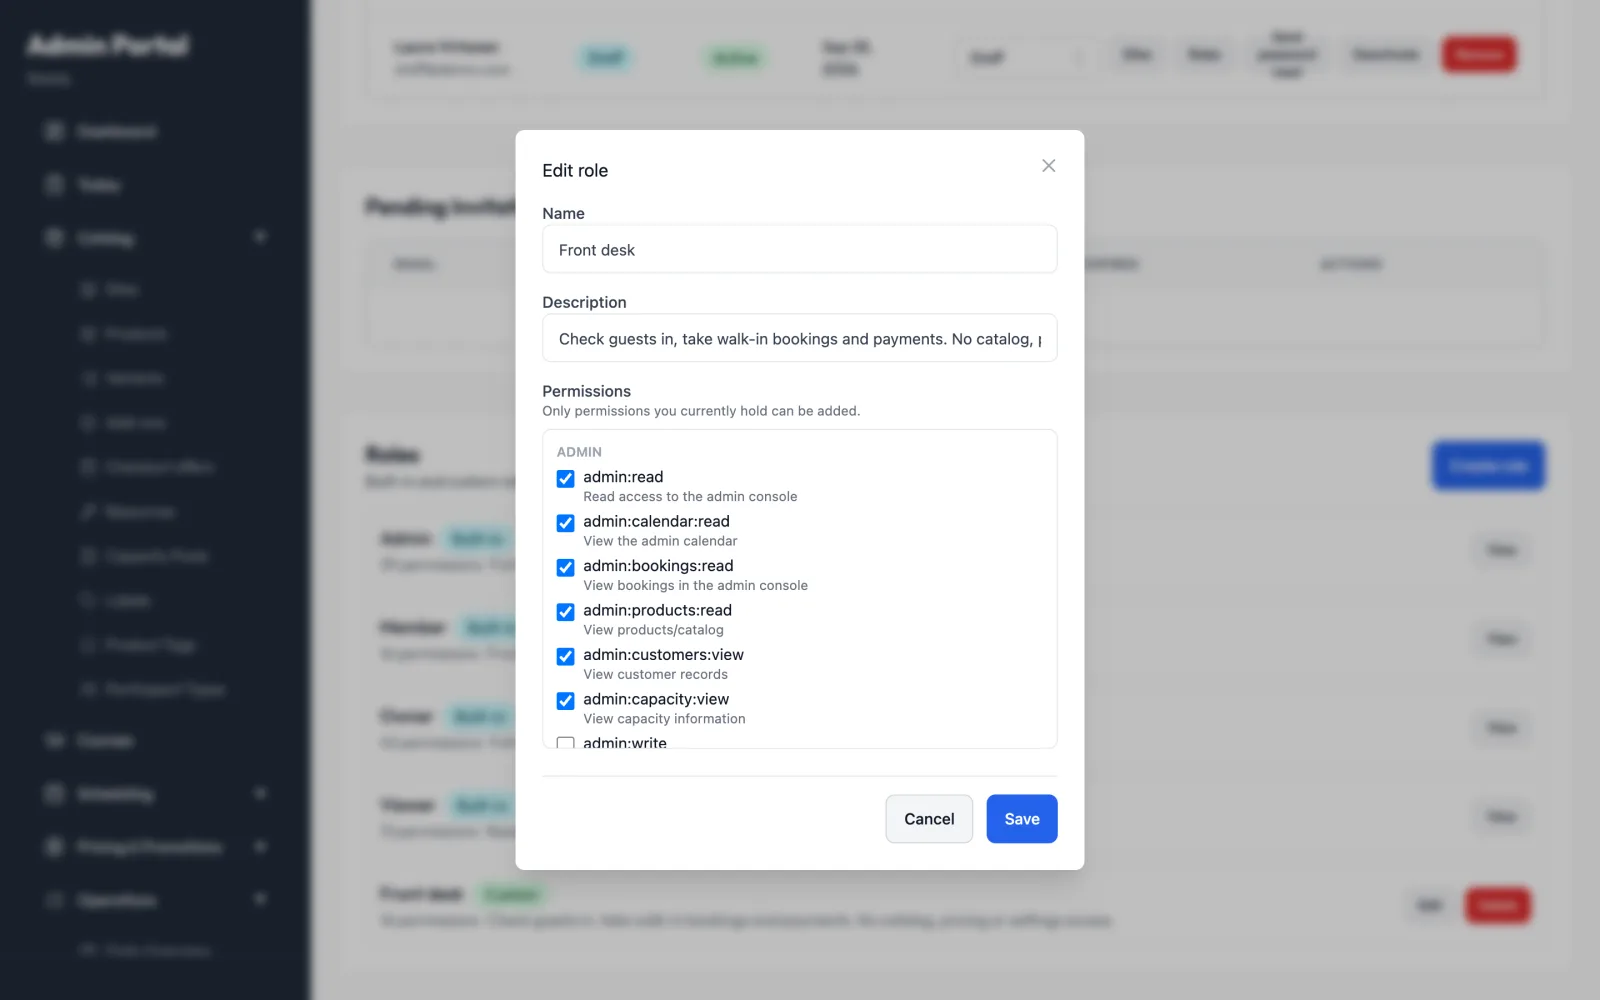
Only permissions you currently hold can be added. You can't create a role that is more powerful than your own. If the list looks shorter than expected, ask an Owner to create the role.
To change a custom role later, click Edit. To delete it, click Delete and confirm. Members who had that role lose its permissions.
Assign roles to a member
The Roles button on a member's row opens their Role assignments. Here you can give someone extra roles, either for the whole business or for a single site. You need the permission to manage team members, roles and assignments to see it.
- Click Roles on the member's row.
- Under Current assignments, check what they already have. Each assignment shows Whole tenant or Site: name.
- Under Add assignment, choose a role.
- Choose Whole tenant or Specific site. For a specific site, pick the site.
- Click Add assignment.
A member's access is the combination of all their assignments. For example, someone can be Admin of one site and Viewer of another.
To take an assignment away, click Remove next to it.
A role with Restricted permissions can only be assigned to the Whole tenant, not to a specific site. The dialog tells you when this applies.
Related pages
- Admin overview: signing in and finding your way around
- Settings and branding: venue-wide settings, branding and API keys
- Mobile app: using the admin on a phone